
A 4-way switch wiring diagram provides a clear guide for controlling a single light fixture from multiple locations, typically three or more, using 4-way switches․ These diagrams are essential for safe and correct installations, offering visual representations of wire connections and terminals․ They help professionals and DIYers understand how to connect black, white, and ground wires properly․ Downloadable PDF versions are widely available, ensuring easy access to detailed schematics for various setups, including power at the switch, light fixture, or both․
What is a 4-Way Switch?
A 4-way switch is an electrical device used to control a single light fixture from three or more locations․ It is typically installed between two 3-way switches, enabling multiple control points․ Unlike a 3-way switch, a 4-way switch does not directly connect to the power source or the light fixture․ Instead, it acts as an intermediary, routing the electrical current between the switches․ The 4-way switch has four terminals, allowing it to connect two pairs of traveler wires․ This setup ensures seamless switching operations, providing flexibility in lighting control systems․
Why Use a Wiring Diagram?
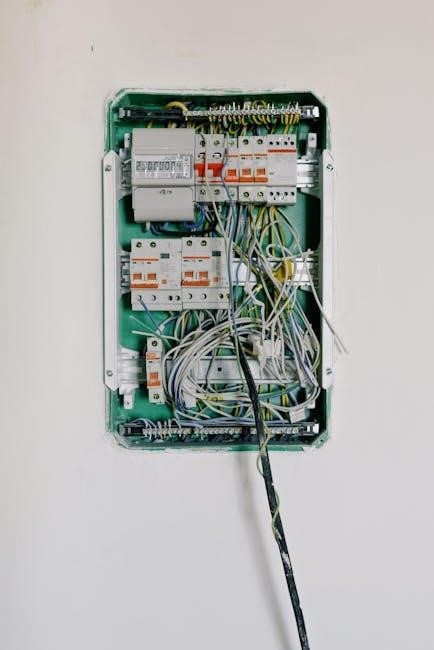
A wiring diagram is essential for ensuring safe and correct installation of a 4-way switch․ It provides a visual representation of wire connections, terminals, and circuit pathways, making complex setups easier to understand․ By following the diagram, you can avoid common mistakes and ensure proper functionality․ It also serves as a troubleshooting reference, helping identify issues quickly․ A wiring diagram guarantees compliance with electrical standards, offering clear guidance for power distribution, neutral connections, and grounding․ This visual tool is indispensable for both professionals and DIY enthusiasts, ensuring reliability and safety in the circuit․
Components of a 4-Way Switch
A 4-way switch includes terminals (L1, L2, T1, T2), a ground terminal, and connects black (hot), white (neutral), and ground wires to control lighting from multiple locations․
Understanding the Terminals
A 4-way switch features four brass terminals (L1, L2, T1, T2) and a green ground screw․ L1 and L2 connect to incoming and outgoing traveler wires, while T1 and T2 connect to other switches․ The ground terminal ensures safety by providing a path for excess current; Properly identifying and connecting these terminals is crucial for the circuit to function correctly․ Refer to the wiring diagram to ensure all terminals are connected accurately, avoiding short circuits or malfunctioning controls․
Types of Wires Used
In a 4-way switch wiring diagram, three main types of wires are used: black (hot), white (neutral), and ground wires․ The black wire carries power, while the white wire is neutral․ Ground wires ensure safety by providing a path for excess current․ For multiple light setups, 14-3 cables are often used to connect switches, allowing for traveler wires between 4-way switches․ Proper identification and connection of these wires are essential for safe and functional circuit operation, as outlined in the wiring diagram․
Setting Up the 4-Way Switch
Setting up a 4-way switch involves understanding how power enters the circuit—either at the switch, the light fixture, or both․ Wiring diagrams provide clear visual guidance for each configuration, ensuring safe and correct installation․
Power at the Switch
When power enters the 4-way switch, the hot wire connects to the common terminal․ The traveler wires are then connected to the remaining terminals․ This setup allows the switch to control the light fixture by completing or breaking the circuit․ The neutral wire is not used in this configuration․ A 4-way switch acts as an intermediary, ensuring the circuit remains closed or open as needed․ Always use 14-3 or 12-3 cables for proper connections․ Ensure power is turned off before starting work and follow local electrical codes for safety․ This configuration is ideal for multi-location control systems․
Power at the Light Fixture
When power originates at the light fixture, the hot wire connects directly to the fixture․ The neutral wire is also connected to the fixture, while the traveler wires are routed through the 4-way switches․ This setup ensures the light can be controlled from multiple locations․ The 4-way switch acts as an intermediary, allowing the traveler wires to complete or break the circuit․ Use 14-3 or 12-3 cables for proper connections․ Always turn off power before starting work and follow safety guidelines to avoid electrical hazards․ This configuration is ideal for installations where the fixture is the power source․
Power at Both Switch and Fixture
In this configuration, power is supplied to both the 4-way switch and the light fixture independently․ The neutral wire connects directly to the fixture, while the hot wire from the power source is connected to the switch․ Traveler wires link the switches, enabling control from multiple locations․ Ground wires ensure safety by providing a path to earth․ This setup is useful when power is available at both the switch and fixture locations․ Always disconnect power before starting work and verify connections with a wiring diagram to avoid errors and ensure proper functionality․ This dual-power setup offers flexibility in lighting control systems․

Connecting the Wires
Connect the black (hot) wires to the switch terminals, ensuring proper linkage between switches․ Use traveler wires to maintain continuity, and secure all connections tightly for reliable functionality․
Black (Hot) Wires
Black wires, known as hot wires, carry electrical power․ When wiring a 4-way switch, connect black wires to the switch terminals, ensuring they are securely attached․ Use traveler wires between switches to maintain circuit continuity․ Properly connecting these wires ensures the light fixture receives power when any switch is toggled․ Always turn off power before working and verify connections with a voltage tester for safety․ Follow the wiring diagram to avoid mistakes and ensure reliable operation․
White (Neutral) Wires
White wires, known as neutral wires, complete the circuit by returning current to the power source․ When wiring a 4-way switch, connect all white wires together, ensuring they are securely attached to each other but not to the switch terminals․ This connection is crucial for maintaining a safe and functional circuit․ Always turn off power at the circuit breaker before working and verify with a voltage tester․ Properly connecting neutral wires prevents electrical hazards and ensures the system operates correctly․ Consult the wiring diagram for precise connections to avoid errors․
Ground Wire Connections
Ground wires, typically bare or green, ensure safety by providing a path to earth, preventing electrical shocks․ When wiring a 4-way switch, connect all ground wires together and secure them to the grounding terminals on the switch and electrical boxes․ Proper grounding is essential for safety and to meet local electrical codes․ Ensure all connections are tight and not overlooked, as this can lead to hazardous conditions․ Always refer to the wiring diagram for specific ground wire routing and connections to guarantee a safe installation and compliance with regulations․
How to Read the Wiring Diagram
Understanding the symbols and color coding in a 4-way switch wiring diagram is crucial․ It visually represents connections, cross-referencing with installation steps for clarity․
Understanding Symbols
In a 4-way switch wiring diagram, symbols represent components like switches, lights, and wires․ Circles often denote switches, while squares may indicate light fixtures․ Lines symbolize wires, with colors coding their purpose: black for hot, white for neutral, and green or bare for ground․ Terminal labels (e․g․, L1, L2) show connections․ Arrows or dots may indicate flow direction․ Understanding these symbols is key to interpreting the diagram accurately and ensuring safe, correct installations․ This visual language helps in mapping the circuit layout effectively․
Labeling and Color Coding
Labeling and color coding in 4-way switch wiring diagrams ensure clarity and safety․ Terminals are labeled to indicate connections, such as L1, L2, and T1/T2 for travelers․ Wires are color-coded: black (hot), white (neutral), and green or bare (ground)․ This standardized system helps identify each wire’s purpose, preventing mistakes․ Proper labeling ensures the correct circuit path, while color coding adheres to electrical standards․ This clear visual system is essential for safe and accurate installations, especially in complex multi-switch setups․

Installation Steps
Begin by preparing wires, ensuring proper insulation removal․ Loop wires clockwise around terminal screws and tighten securely․ Connect black, white, and ground wires as per the diagram․ Use 14-3 cables for interconnections․ For multiple lights, link white-to-white and black-to-black wires․ Double-check all connections before restoring power to complete the circuit safely and efficiently․
Preparing the Wires
Before installation, ensure all wires are properly prepared․ Remove insulation from conductors, approximately 5/8 inch for side wires and 1/2 inch for back wires․ Loop wires clockwise around terminal screws and tighten securely․ Use 14-3 cables for connections between switches and fixtures․ Ensure the ground wire is correctly attached to the grounding terminal․ Double-check all wire connections for accuracy and security․ Turn off power at the circuit breaker before starting work․ Always follow the wiring diagram for specific instructions to avoid errors․
Connecting to the Switch
Connect the wires to the 4-way switch by attaching the black (hot) and red (traveler) wires to the brass terminals․ The white (neutral) wire connects to the silver terminal, and the ground wire attaches to the grounding screw․ Loop wires clockwise around terminal screws and tighten firmly․ Ensure the common terminal is correctly identified and connected․ For multiple lights, use 14-3 cables between switches and fixtures․ Verify all connections match the wiring diagram before proceeding․ Always turn off power at the circuit breaker to prevent electric shock during installation․
Finalizing the Circuit
After connecting all wires to the 4-way switch and associated switches, ensure the circuit is complete․ Verify that the black (hot) and red (traveler) wires are securely attached to the brass terminals, while the white (neutral) wire connects to the silver terminal․ Double-check the ground wire connections to the grounding screws․ Test the circuit by turning the power back on and verifying proper operation of all switches․ Ensure no loose connections remain and that all wires are properly insulated․ This step is crucial for safety and functionality․ A PDF wiring diagram can help confirm the setup․

Safety Tips and Precautions
Always turn off power at the circuit breaker before starting work․ Use insulated tools to prevent electric shock․ Avoid common mistakes, such as incorrect wire connections․ Refer to the wiring diagram PDF for guidance․
Turning Off Power
Always disconnect power at the circuit breaker or fuse box before starting any wiring work․ Verify the circuit is de-energized using a voltage tester․ Never assume the power is off without confirmation․ Failure to do so can result in electric shock or death․ Ensure all wires are safely insulated and tools are properly grounded․ This precaution is non-negotiable for safe installation․ Refer to the wiring diagram PDF for specific shutdown procedures․ Consulting a licensed electrician is recommended if unsure about any step․
Using Proper Tools
Using the right tools is crucial for a safe and successful wiring project․ Essential tools include a voltage tester, wire strippers, needle-nose pliers, and screwdrivers․ A voltage tester ensures the circuit is de-energized, while wire strippers safely remove insulation․ Needle-nose pliers help with wire connections, and screwdrivers secure wires to terminals․ Always refer to the 4-way switch wiring diagram PDF for tool recommendations․ Proper tools prevent damage to wires and switches, ensuring reliable connections and long-term functionality․ Investing in quality tools is vital for professional-grade results and safety․
Avoiding Common Mistakes
Common mistakes in 4-way switch wiring include incorrect wire connections and improper grounding․ Always ensure the circuit is de-energized before starting․ Misidentifying terminal connections can lead to faulty operation․ Consult the wiring diagram to verify terminal assignments․ Improper wire stripping or loose connections can cause short circuits․ Double-check all wire links and ensure screws are tightened securely․ Using the wrong wire gauge or ignoring ground wires can compromise safety․ Always follow the diagram and manufacturer guidelines to avoid errors and ensure a safe, functional installation․

Troubleshooting Common Issues
Common issues with 4-way switches include lights not turning on, switches not working, or flickering․ Check connections, ensure proper wire links, and verify terminal assignments using the wiring diagram․
Light Not Turning On
If the light fails to turn on, check for loose connections or incorrect wiring․ Verify that the black (hot) and white (neutral) wires are properly connected․ Ensure the ground wire is securely attached․ Consult the 4-way switch wiring diagram to confirm terminal assignments․ Power should be present at the switch or fixture, depending on the setup․ Test the circuit by toggling all switches to ensure proper operation․ If issues persist, verify that the correct wires are linked between switches and the fixture, as indicated in the PDF diagram․
Switch Not Working
If the switch is not working, inspect for loose connections or improper wiring․ Ensure black (hot) wires are connected to brass terminals and traveler wires to silver terminals․ Verify that power is present at the switch using a multimeter․ Check the wiring diagram to confirm correct terminal assignments․ Ensure all connections are secure and match the diagram․ If issues persist, test the circuit by bypassing the switch temporarily․ Consult the PDF guide for detailed troubleshooting steps to identify and resolve the issue effectively․
Flickering Lights
Flickering lights in a 4-way switch setup often indicate loose connections or improper wiring․ Check the traveler wires between switches and ensure they are securely connected to the correct terminals․ Verify that the neutral wire is properly linked, as an open neutral can cause voltage fluctuations․ Inspect the ground wire for any damage or loose connections, as poor grounding can lead to flickering․ Consult the wiring diagram to confirm all connections match the schematic․ If issues persist, consider replacing the switch or consulting a licensed electrician for assistance․
The 4-way switch wiring diagram guide provides a comprehensive overview for safe and efficient installations․ Proper wiring ensures reliable control of lighting systems, enhancing safety and functionality․
A 4-way switch wiring diagram is essential for managing multiple light controls from different locations․ It involves understanding terminals, wire types, and connections․ Proper setup ensures safety and functionality, whether power is at the switch, fixture, or both․ Following diagrams helps avoid common mistakes like incorrect wire connections․ Always turn off power and use appropriate tools․ Correct wiring prevents hazards and ensures reliable operation․ Downloadable PDFs provide detailed visuals for various configurations, making installations easier for both professionals and DIY enthusiasts․
Importance of Correct Wiring
Correct wiring is crucial for safety and functionality in electrical systems․ Proper connections ensure lights and switches operate reliably, preventing hazards like short circuits or electric shock․ Incorrect wiring can lead to system failures or fires, making adherence to diagrams vital․ A 4-way switch wiring diagram guides accurate installations, ensuring all terminals and wires are connected safely and efficiently․ This prevents malfunctions and guarantees compliance with electrical codes, protecting both people and property from potential risks associated with faulty wiring practices․

Download the 4-Way Switch Wiring Diagram PDF
The 4-way switch wiring diagram PDF is a comprehensive resource for installing and troubleshooting multi-location lighting systems․ It provides detailed schematics, wire color coding, and step-by-step instructions for various setups․ Available for free download, the PDF ensures clarity and accuracy, covering configurations like power at the switch, fixture, or both․ Whether you’re a professional or DIYer, this guide simplifies complex wiring tasks, offering a reliable reference for safe and efficient installations․ Download it today for precise wiring layouts and diagrams․