Belgard retaining walls offer robust‚ appealing solutions for landscape needs. They are essential for managing slopes‚ preventing erosion‚ and defining outdoor spaces. This guide details proper installation‚ ensuring structural integrity and enhancing property functionality and aesthetic value.
Benefits of Belgard Systems
Belgard retaining wall systems offer a multitude of advantages‚ making them a premier choice for landscape enhancements; Their primary benefit lies in exceptional durability and longevity. Engineered with high-quality materials‚ Belgard blocks withstand erosion‚ freeze-thaw cycles‚ and heavy soil pressures‚ ensuring a stable‚ reliable structure for decades. This robust construction provides unparalleled structural integrity‚ crucial for managing slopes‚ creating level planting beds‚ or defining distinct outdoor areas.
Beyond practical strength‚ Belgard systems significantly enhance aesthetic appeal. Available in an extensive array of textures‚ colors‚ and block styles‚ they seamlessly integrate with diverse architectural designs and landscape themes‚ allowing homeowners and professionals to achieve a custom‚ polished look. Their versatility is another key advantage‚ suitable for intricate garden borders‚ large-scale terraced landscapes‚ and critical erosion control projects. The interlocking design often simplifies installation compared to traditional methods‚ contributing to efficiency. Furthermore‚ investing in Belgard walls can substantially increase property value and curb appeal‚ transforming unusable sloped terrain into functional‚ beautiful outdoor spaces with minimal ongoing maintenance.
Types of Belgard Retaining Wall Blocks
Belgard provides a diverse array of block styles‚ each specifically engineered for distinct structural and aesthetic requirements in various retaining wall projects. The Versa-Lok system is a popular choice‚ featuring a robust pin-interlocking mechanism creating sturdy‚ mortarless walls suitable for curved designs and significant heights. Available in various finishes like standard and mosaic‚ it offers excellent design flexibility for custom looks. Another widely used option is Weston Stone‚ admired for its natural‚ weathered appearance‚ closely resembling quarried stone. These blocks are highly versatile‚ ideal for garden walls‚ outdoor kitchens‚ and informal landscape features‚ adding a rustic yet refined aesthetic.
For larger‚ more demanding structural applications‚ Belgard’s Tandem Wall system offers an innovative solution. This system blends natural stone aesthetics with large-format block strength‚ often needing geogrid reinforcement for taller constructions. The Anchor Wall series‚ including Highland Stone and Diamond Pro‚ provides robust residential and commercial solutions. Highland Stone beautifully mimics natural stacked stone‚ while Diamond Pro is a heavy-duty option for stringent engineering needs. Each block type ensures exceptional durability‚ ease of installation‚ and complements diverse landscape designs‚ from modern to classic‚ guaranteeing a perfect outcome.

Essential Tools and Materials for Installation
Successful Belgard retaining wall installation requires specific tools and materials. Key items include hand tools‚ potentially heavy equipment for large jobs‚ Belgard wall blocks‚ geogrid‚ drainage aggregate‚ and suitable backfill. Proper preparation ensures a durable‚ appealing structure.
Required Hand Tools
For a successful Belgard retaining wall installation‚ specific hand tools are truly indispensable. These instruments ensure accuracy in measurements‚ efficiency in excavation‚ and precision in block placement‚ directly contributing to the structural integrity and aesthetic quality of your project.
- Shovels and Rakes: Crucial for trench excavation and spreading base materials effectively.
- Measuring Tape: Indispensable for accurately marking the wall layout and consistent dimensions.
- Spirit Level and String Line: Essential for establishing a perfectly level base and uniform height/alignment across all wall courses.
- Rubber Mallet: Used for gently adjusting and seating blocks‚ preventing damage.
- Mason’s Chisel and Hammer: For precise block adjustments or cutting.
- Hand Tamper: Critical for compacting the subgrade and leveling pad‚ providing a solid foundation.
- Wheelbarrow: Facilitates efficient transport of blocks‚ aggregates‚ and excavated soil.
- Safety Gear: Includes safety glasses and gloves‚ vital for personal protection.
- Utility Knife: For clean‚ accurate cutting of geogrid reinforcement.
Equipping yourself with these hand tools streamlines installation significantly‚ ensuring a professional‚ durable finish.
Heavy Equipment Considerations
For larger Belgard retaining wall projects or those involving extensive excavation and material handling‚ considering heavy equipment becomes paramount. While smaller walls can often be completed with hand tools‚ significant undertakings benefit immensely from the speed and efficiency offered by machinery. An excavator or skid steer loader can drastically reduce the time and physical effort required for trenching‚ moving soil‚ and transporting heavy Belgard blocks. These machines are particularly valuable on sites with challenging terrain or where large quantities of aggregate and backfill material need to be managed.
Furthermore‚ a vibratory plate compactor is often considered essential heavy equipment‚ even for moderately sized walls. Achieving proper compaction of the subgrade and leveling pad is critical for the long-term stability and structural integrity of the retaining wall. Manual tampers are suitable for small areas‚ but a plate compactor ensures uniform and deep compaction‚ preventing settlement issues down the line. When planning‚ assess site access‚ rental costs‚ and the need for skilled operators to ensure a smooth and safe installation process.
Belgard Wall Blocks and Geogrid
Belgard retaining wall blocks serve as the fundamental structural elements‚ engineered to create robust and aesthetically pleasing landscape features. These blocks come in various designs‚ textures‚ and colors‚ allowing for customization to match specific design visions. The careful selection of the correct block type is vital‚ considering both the desired appearance and the engineering requirements of the wall‚ such as height and load. Proper calculation of the number of blocks needed is essential for efficient material procurement and project execution‚ ensuring the wall’s integrity and visual appeal.
For taller or more heavily loaded retaining walls‚ geogrid reinforcement becomes a critical material. Geogrid is a high-strength polymeric mesh designed to be placed horizontally between specific courses of Belgard blocks and extended into the compacted backfill. Its primary role is to reinforce the soil mass behind the wall‚ creating a composite structure that significantly enhances stability and prevents potential failures like overturning or bulging. This material effectively ties the wall face into the stable soil mass‚ distributing lateral pressures and improving the overall structural performance and longevity of the retaining system.
Drainage Aggregate and Backfill Material
Effective water management is paramount for the longevity of any Belgard retaining wall‚ making the selection and proper placement of drainage aggregate crucial. Typically‚ 3/4-inch clean crushed stone or gravel is used‚ as its void spaces allow water to pass through freely. This aggregate is placed directly behind the wall blocks‚ forming a permeable zone that prevents hydrostatic pressure from building up against the wall face. Accumulated water‚ if not properly drained‚ can exert immense pressure‚ leading to bowing‚ cracking‚ or structural failure‚ especially during freeze-thaw cycles.
Complementing the drainage aggregate‚ appropriate backfill material provides essential structural support. This should be a granular‚ well-draining soil‚ free from organic matter‚ clay‚ or large debris. The backfill is placed in successive layers‚ often 6 to 8 inches thick‚ and meticulously compacted using a plate compactor. Each lift must be adequately densified to prevent future settlement‚ which could compromise the wall’s alignment and stability. This synergy of efficient drainage and stable‚ compacted backfill ensures the Belgard retaining wall withstands environmental forces‚ maintaining its integrity and aesthetic appeal over time.

Site Preparation and Excavation
Site preparation is crucial for any Belgard retaining wall. Begin by accurately marking the wall layout. Next‚ excavate the trench to the specified depth and width. Finally‚ compact the subgrade thoroughly‚ creating a stable‚ level foundation for successful installation.
Marking the Wall Layout
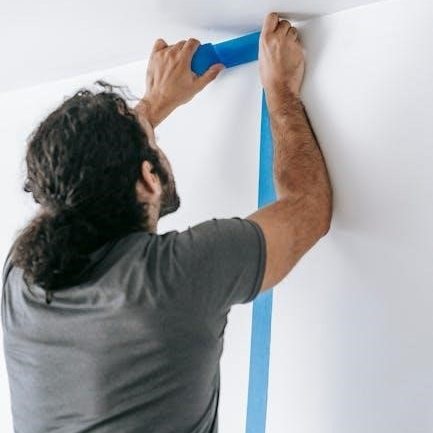
Before any ground excavation‚ precisely marking the Belgard retaining wall layout is a fundamental first step‚ ensuring accuracy and adherence to design specifications. This translates your planned design from paper to the actual installation site. Start by identifying the exact location of the wall’s front face‚ using spray paint or chalk to outline its path on the ground. For straight sections‚ drive stakes at each end and stretch a taut string line between them‚ representing the desired alignment. For curved walls‚ use flexible garden hoses or multiple short stakes and string segments to gently follow the intended arc. It is crucial to consider the wall’s base width‚ which typically exceeds the block width‚ accommodating the leveling pad and drainage. Mark this additional width for your excavation trench‚ usually adding 6-12 inches behind the front face line. Double-check all measurements against your plans‚ paying close attention to any corners‚ steps‚ or unique features. Confirm that the marked layout respects property lines‚ underground utilities‚ and required setbacks. This meticulous initial marking prevents costly errors later‚ setting the stage for a structurally sound and visually appealing Belgard retaining wall.

Excavating the Trench
With the wall layout clearly marked‚ the next critical step involves excavating the trench that will house the retaining wall’s foundation. This trench must be dug to the precise dimensions necessary to accommodate the leveling pad and the first course of Belgard blocks‚ ensuring stability and proper drainage. Begin by digging to the predetermined depth‚ which typically includes the height of your chosen base material (usually 4-6 inches of compacted crushed stone) plus the embedment depth for the first course of blocks. Many installations recommend burying at least half‚ if not the full height‚ of the first block below grade for optimal stability and frost protection. The trench width should comfortably exceed the block width‚ usually by 6-12 inches on the back side‚ to allow for the future installation of drainage aggregate and backfill. Use shovels or a mini-excavator‚ depending on the scale of your project‚ maintaining straight‚ vertical trench walls. It is essential to achieve a relatively flat and consistent subgrade at the bottom of the trench‚ removing any loose soil‚ roots‚ or debris. Use a line level across the trench to verify the approximate levelness‚ as minor adjustments will be made during compaction. Carefully remove all excavated soil from the work area‚ preparing for subsequent steps.
Compacting the Subgrade
Following the excavation of the trench‚ the next crucial step is thoroughly compacting the subgrade. This process is paramount for the long-term stability and performance of your Belgard retaining wall. A properly compacted subgrade prevents future settling‚ which could lead to cracks‚ uneven courses‚ or even wall failure. Begin by ensuring the bottom of the trench is free of any loose soil‚ rocks‚ or organic matter. If the soil is excessively dry‚ lightly moisten it with water; this helps achieve optimal compaction density. Avoid oversaturating the soil‚ as this can hinder effective compaction. Utilize a plate compactor‚ readily available for rent‚ to compact the entire trench bottom. Make multiple passes over the entire area‚ working systematically in overlapping patterns. It’s often recommended to compact in lifts if the trench is deeper than standard‚ though for typical trench depths‚ direct compaction is sufficient. The goal is to create a firm‚ unyielding surface that will evenly distribute the weight of the wall. Test the compaction by walking on the subgrade; it should feel solid with no noticeable give. This dense foundation is essential before laying any base material‚ ensuring your retaining wall has a stable and durable footing‚ critical for its structural integrity and longevity against environmental stresses. This step cannot be overlooked for a successful installation.

Creating the Leveling Pad
Creating the leveling pad is essential for wall stability. A uniform layer of granular base material‚ like crushed stone‚ is spread. Meticulously compacting and leveling this pad ensures the initial block course rests perfectly even‚ preventing future settlement.
Laying the Base Material
Once the subgrade is properly compacted‚ the next critical step involves laying the base material for the leveling pad. This foundation is paramount for the long-term stability and performance of your Belgard retaining wall. Typically‚ a high-quality granular material such as crushed stone or gravel‚ free from organic matter‚ is recommended. The depth of this base layer is crucial and generally ranges from 4 to 6 inches‚ though it can vary based on the wall’s height and local soil conditions. Consult Belgard’s specific product guidelines or engineering specifications for precise requirements.
Begin by carefully spreading the chosen base material evenly across the entire length and width of the excavated trench. It is vital to maintain a consistent depth throughout. If the required depth is substantial‚ it’s advisable to lay the material in multiple lifts‚ typically 2 to 3 inches per lift‚ rather than one thick layer. After each lift‚ lightly moisten the material to aid in proper compaction. Then‚ use a plate compactor to thoroughly compact the layer. This sequential laying and compacting ensures optimal density‚ significantly reducing the potential for future settling or shifting of the wall‚ thereby providing a robust and dependable footing for the entire structure.
Achieving a Perfectly Level Base
Once the base material is laid and compacted‚ the absolute precision of its level is paramount for the entire retaining wall’s success. A perfectly level base is the cornerstone for a stable‚ plumb‚ and aesthetically pleasing structure. To achieve this‚ begin by using a long‚ straight 4-foot level or a laser level across the width and length of the entire trench. String lines can also be stretched tautly across the trench‚ anchored to stakes at either end‚ to serve as a visual guide for the desired finished grade.
Carefully check for any high or low spots. If the base material is too high in an area‚ use a rake or shovel to gently remove a small amount and re-compact. Conversely‚ if there are low spots‚ add small increments of the base material‚ ensuring it’s spread evenly‚ then re-compact it thoroughly. This process of checking‚ adjusting‚ and re-compacting must be meticulous and repetitive until the entire leveling pad is perfectly level in all directions. Even a slight deviation at this stage can compound errors in subsequent courses‚ leading to an unstable or visibly crooked wall. This foundational accuracy prevents future settling and ensures the interlock and alignment of Belgard blocks will be maintained throughout the wall’s lifespan.
Installing the First Course of Blocks
Placing the initial Belgard blocks requires precision. Carefully set each unit onto the perfectly level base‚ ensuring firm contact. Use a rubber mallet to gently adjust‚ maintaining continuous level and alignment. This crucial first course establishes the foundation‚ dictating the entire retaining wall’s stability and appearance.
Placing the Initial Blocks
The meticulous placement of the first course of Belgard blocks is paramount for the entire retaining wall’s stability and aesthetic appeal. Start by carefully positioning the initial block at the lowest point of your prepared trench or a designated corner. Gently set the block onto the compacted leveling pad‚ ensuring firm contact with the granular base material. This crucial step prevents future settling.
Immediately‚ use a spirit level to check the block’s levelness both front-to-back and side-to-side. Rectify any deviations now. Employ a rubber mallet to gently tap down the block if too high‚ or carefully lift it to add/remove a small amount of bedding aggregate beneath for perfect horizontal alignment. Continuously refer to your layout string line for precise alignment along the wall’s footprint. Place subsequent blocks‚ ensuring each unit is either tightly abutted or spaced as per the specific Belgard system‚ accommodating interlocking pins. Each block requires individual checking for levelness and alignment before progressing. The accuracy of this foundational course directly influences the structural integrity and visual quality of the entire retaining wall‚ making diligence here crucial for a successful‚ lasting installation.
Ensuring Level and Alignment
Ensuring the absolute levelness and precise alignment of the first course of Belgard retaining wall blocks is truly paramount. Errors here compound‚ inevitably leading to an unstable‚ unsightly‚ or failing wall over time. Therefore‚ meticulous attention to detail is non-negotiable for a truly lasting structure.
Utilize a high-quality‚ long spirit level to meticulously check each individual block for levelness from front-to-back and side-to-side. Address any minor deviations immediately. If a block sits too high‚ gently tap it down with a rubber mallet. If too low‚ carefully lift it‚ add a small amount of leveling pad aggregate underneath‚ then re-check. Once individual blocks are perfectly level‚ extend your spirit level across two or three adjacent units to confirm they maintain the same consistent plane.
Concurrently‚ employ your pre-staked string line to verify the wall’s straightness or consistent curve. The front edge of each block should precisely align with or maintain a uniform offset from this guiding line. Periodically‚ step back for a thorough visual inspection of the entire course. This continuous verification guarantees a professional‚ durable Belgard retaining wall‚ establishing a rock-solid foundation for all subsequent layers.

Building Subsequent Courses and Drainage
Build the wall upwards‚ carefully staggering each course of blocks for structural integrity. Utilize interlocking pins to secure layers. Crucially‚ integrate proper drainage techniques‚ including aggregate and backfill‚ behind the wall as you ascend‚ preventing water pressure buildup and ensuring lasting stability and performance.
Staggering Blocks and Interlocking Pins
As you advance beyond the initial course‚ the method of block placement is critical for the wall’s overall strength and appearance. Begin each subsequent row by offsetting the blocks‚ typically by half their length‚ from the joints of the course below. This creates a staggered pattern‚ fundamental to distributing weight evenly and preventing continuous vertical seams that could weaken the structure. This technique‚ often called a running bond‚ significantly enhances the wall’s stability and resistance to shifting.
Once a block is positioned‚ incorporate the interlocking pins. These crucial components create a secure mechanical connection between successive layers. Insert pins into the pre-drilled holes on the top surface of the blocks in the lower course. Then‚ carefully align the new block‚ ensuring its holes fit precisely over the protruding pins. Gently tap the block into place with a rubber mallet to ensure a snug fit‚ confirming each block is firmly seated and level with its neighbors. Continuously check for level and alignment‚ adjusting as necessary to maintain integrity and aesthetic appeal. This meticulous attention to detail during block staggering and pin placement is paramount for a durable and professional retaining wall.
Installing Geogrid Reinforcement (if needed)
Geogrid reinforcement is a critical component for taller Belgard retaining walls or those subjected to significant loads and poor soil conditions. Its primary function is to provide tensile strength‚ tying the wall face back into the stable soil mass behind it‚ thereby increasing overall stability and preventing structural failure. Consult Belgard’s specifications or an engineer’s design to determine the exact courses where geogrid should be installed‚ as this varies based on wall height‚ soil type‚ and anticipated surcharges.
When installation is required‚ lay the geogrid directly on top of the leveled block course at the specified interval. The rough side should face up. Extend the geogrid backward into the excavated area‚ typically a distance equivalent to at least 60-70% of the wall’s height‚ or as per design. Ensure the geogrid is pulled taut and free of wrinkles. Pin it in place with landscape staples if necessary to keep it flat during backfilling. Overlap multiple geogrid sections by a minimum of 6 inches if splicing is unavoidable. Place the next course of Belgard blocks directly on top of the geogrid‚ ensuring proper alignment with the interlocking pins. This integration creates a reinforced soil mass‚ significantly enhancing the wall’s long-term performance and stability.
Adding Drainage Aggregate and Backfill
Proper drainage is paramount for the long-term stability and performance of a Belgard retaining wall‚ mitigating hydrostatic pressure that can lead to failure. Once a block course is laid and geogrid (if needed) installed‚ a layer of drainage aggregate must be placed immediately behind the wall. This typically consists of clean‚ crushed angular stone‚ such as 3/4-inch gravel‚ free of fines. This aggregate should extend at least 12-18 inches behind the blocks and must completely encapsulate the perforated drain pipe laid behind the first course. Ensure the aggregate is placed evenly and extends upwards with each subsequent block course.

Following drainage aggregate placement‚ a non-woven filter fabric is often installed between the drainage zone and general backfill material. This fabric prevents fine soil particles from migrating into the drainage stone‚ which could clog the system over time. Finally‚ the remaining area behind the drainage aggregate is filled with suitable backfill. This backfill‚ which should be a compactable‚ well-draining soil‚ must be placed in lifts of no more than 6 to 8 inches. Each lift must be thoroughly compacted using a plate compactor or hand tamper. This layered approach to backfilling and compaction is crucial to prevent future settlement and maintain the structural integrity of the entire retaining wall system.