Article Plan: L-Shaped Desk Assembly Instructions PDF
This guide details assembling your L-shaped desk, referencing the PDF manual (CKP5454GLD BattleStation). It covers parts, tools, steps, and troubleshooting for a smooth build.
Assembling an L-shaped desk can seem daunting, but with a clear understanding of the process and the accompanying PDF manual, it becomes a manageable task. These desks, like the BattleStation (CKP5454GLD) model, offer expansive workspace ideal for gaming, home offices, or creative pursuits.
This guide aims to simplify the assembly, breaking down each step for easy comprehension. We’ll navigate the PDF instructions, identify components, and address potential challenges. Proper assembly ensures stability and maximizes the desk’s functionality. Before beginning, familiarize yourself with the parts list and safety precautions detailed within the manual. A successful build results in a durable and ergonomic workspace tailored to your needs.
Understanding the PDF Assembly Manual

The L-shaped desk PDF assembly manual is your primary resource. It typically begins with a parts list, crucial for verifying all components are present before starting. Diagrams illustrate each step, showing screw and component placement. Pay close attention to the identification of parts – Desktop Components (A), Frame Components (B-F), and Hardware (M6 screws).
The manual is structured sequentially, guiding you from initial frame construction to desktop attachment and final touches. Note specific instructions for models like the CKP5454GLD. Safety warnings are prominently displayed; heed these to prevent injury or damage. Download the manual for convenient access on your PC or mobile device, allowing for easy reference during assembly.

Safety Warnings and Precautions
Prioritize safety during L-shaped desk assembly; Always read the safety warnings before beginning. Work in a spacious, well-lit area, free from obstructions. Wear appropriate safety glasses to protect your eyes from debris. Be mindful of pinch points when connecting frame components.
Ensure the desk is assembled on a protected surface to prevent scratching the floor or desktop. Do not overtighten screws, as this can damage the wood or strip the threads. If lifting is required, use proper lifting techniques or seek assistance. Secure the desk to the wall if necessary, especially if it will support heavy items. Follow all instructions carefully to avoid potential hazards.
Parts List and Identification
Accurate part identification is crucial for successful assembly. Your L-shaped desk kit includes various components, clearly labeled in the PDF manual. Key parts include Desktop components (A), Frame components (B, C, D, E, F), and Crossbars (G). Legs are designated as (9), and additional bars as (H) and (I).
Hardware consists of different sized screws and bolts – specifically M6 x 55mm (B) and M6 x 21mm (E). Desktop Glass pieces are labeled (13). Refer to the provided parts list (page 2 of the manual) to verify you have all necessary items before starting. Familiarize yourself with each part’s shape and function to streamline the process.
4.1 Identifying Desktop Components (A)
Desktop components, labeled ‘A’ in your parts list, form the work surface of your L-shaped desk. These typically consist of two main sections – the primary desktop and the secondary, smaller desktop piece forming the ‘L’ shape.
Some models, like the CKP5454GLD BattleStation, may include Desktop Glass (13) as an optional surface. Carefully inspect each desktop piece for pre-drilled holes, which align with the frame during attachment. Note the finished edges and intended orientation – the smoother, more aesthetically pleasing side should face upwards. Ensure you differentiate between the main board and any peninsula or appendage pieces.
4.2 Identifying Frame Components (B, C, D, E, F)
The desk’s frame, designated by parts B through F, provides structural support. Component ‘B’ typically represents the legs, while ‘C’, ‘D’, ‘E’, and ‘F’ are various bars and supports. Lower Bars (9) attach directly to the legs. Crossbars (G) connect these legs, enhancing stability.
Upper Bars are crucial for desktop attachment, often utilizing M6 x 21mm screws (E). Distinguish between regular and specialized crossbar rails – ensure inward facing slots for proper insertion. The frame components are interconnected, forming a robust base for the desktop sections. Careful identification prevents assembly errors and ensures a sturdy final product.
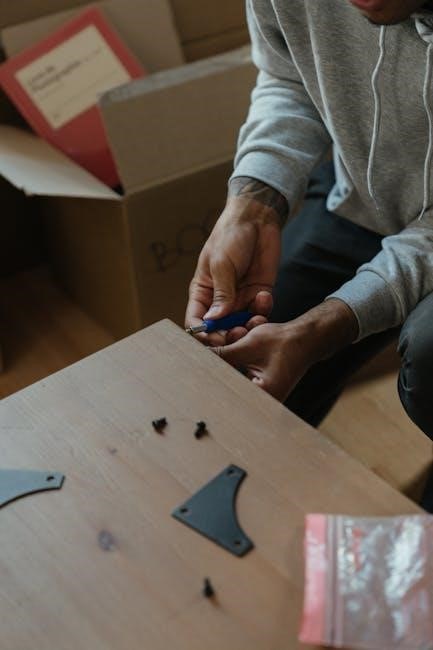
4.3 Identifying Hardware (Screws, Bolts ⏤ M6 x 55mm, M6 x 21mm)

Correct hardware is vital for secure assembly. The L-shaped desk utilizes primarily M6 screws in two key lengths: 55mm and 21mm. M6 x 55mm screws (B) are generally used for attaching the legs to the Lower Bars (9), providing a strong foundational connection. Shorter M6 x 21mm screws (E) secure the desktop to the upper frame components.
Ensure you have sufficient quantities of each size before starting. Misusing screw lengths can compromise stability or damage the desk. The PDF manual details specific hardware usage per step. Double-check each connection to confirm the correct screw type is employed for optimal structural integrity.
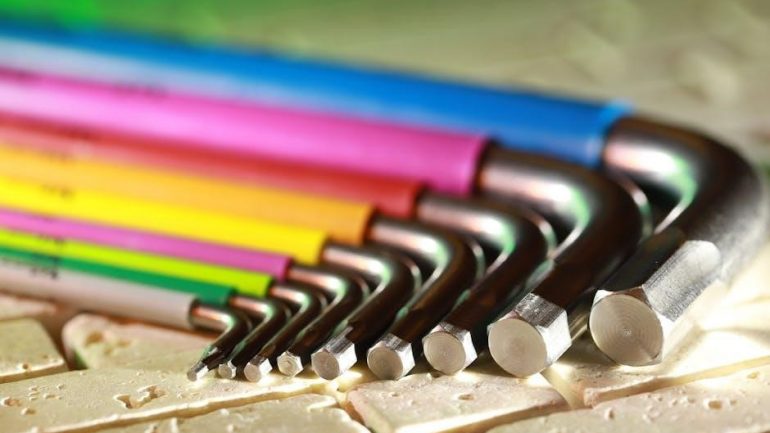
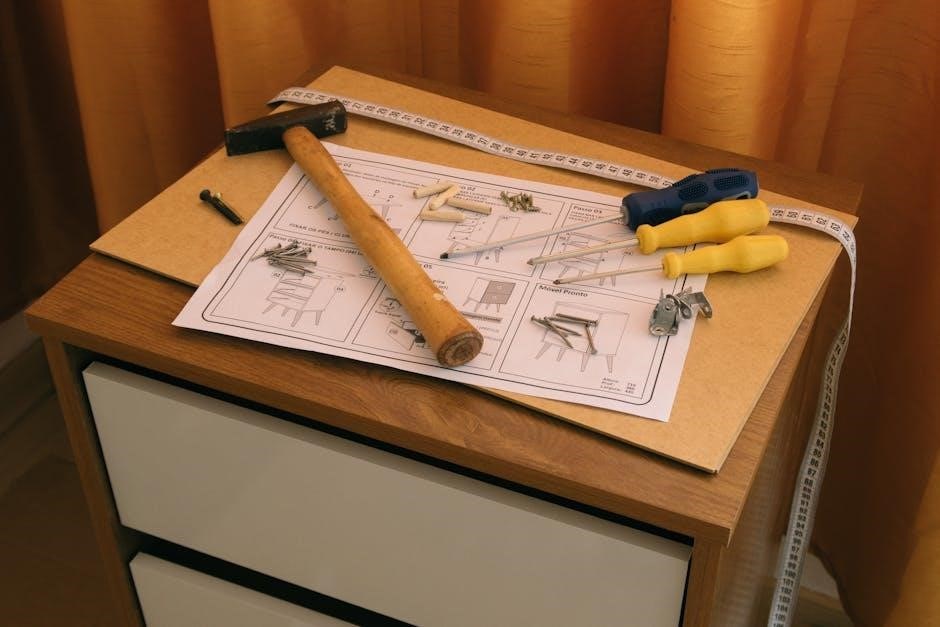
Tools Required for Assembly
Successful L-shaped desk assembly requires a few essential tools. A Phillips head screwdriver is absolutely necessary for tightening the M6 x 55mm and M6 x 21mm screws. While a manual screwdriver will suffice, a power screwdriver with adjustable torque settings is highly recommended for efficiency and preventing over-tightening.
Additionally, having a soft cloth or protective surface to work on prevents scratching the desktop during assembly. A rubber mallet can be helpful for gently tapping components into place. Finally, a second person can be beneficial for lifting and aligning larger parts, especially the desktop sections, ensuring a smoother and safer build process.
Step-by-Step Assembly Guide ー Initial Frame Construction
Begin by constructing the desk’s foundational frame. First, attach the legs (C) to the lower bars (9) using two M6 x 55mm screws (B) per leg. Ensure the legs with the extra hole are positioned at the back. Next, connect the crossbars (G) to this assembled leg and lower bar structure.
The regular crossbar rails should insert into the slots of the crossbar ends, facing inward with the slot closer to the underside. Double-check alignment before fully tightening screws. This initial frame provides the structural support for the desktop sections, so accuracy is crucial for stability.
6.1 Attaching Legs to Lower Bars (9)
Securely fasten the legs (C) to the lower bars (9) as the first step in frame construction. Utilize two M6 x 55mm screws (B) for each leg attachment point. Crucially, identify the back legs – these have an additional hole for later components. Position these legs towards the rear of the desk during assembly.
Ensure the legs are flush against the lower bars before tightening the screws. Do not fully tighten at this stage; allow for slight adjustments during crossbar connection. Proper leg attachment is fundamental for desk stability and prevents wobbling. Double-check screw placement before proceeding.
6.2 Connecting Crossbars (G) to Frame
With the legs attached to the lower bars (9), integrate the crossbars (G) to reinforce the frame’s structure. Insert the regular crossbar rails into the slots on the crossbar ends, ensuring they face inward. The slot should be positioned closer to the underside of the frame for correct orientation.
Carefully align the crossbars with the leg assemblies and secure them using appropriate screws (refer to the parts list). Now, fully tighten all screws from the previous step (leg attachment) and the current step (crossbar connection). This creates a rigid and stable base for the desktop sections.
Desktop Attachment ー Positioning and Alignment
Before securing the desktop, carefully position the assembled frame onto the underside of the desktop surface. Place the desktop on a protected, flat surface to prevent scratches during assembly. Align the legs, ensuring the back legs – those with the extra hole – are positioned at the rear of the desk.
Double-check that the frame is centered on the desktop, leaving equal overhang on all sides (or as desired based on your preference). Precise alignment is crucial for a stable and aesthetically pleasing final product. Take your time during this step to avoid misalignment issues later.
Securing the Desktop to the Frame
With the frame correctly aligned, begin securing it to the desktop using the appropriate hardware – M6 x 55mm screws (B). Attach the legs to the Lower Bar (9) with two screws per leg. Ensure screws are firmly tightened, but avoid over-tightening, which could damage the desktop material.
If your model includes a glass desktop (13), use eight M6 x 21mm screws (E) to attach the glass pieces to the Upper Bars. Work systematically, attaching screws in a diagonal pattern to distribute pressure evenly. Regularly check alignment as you tighten each screw for optimal stability.
Assembling the Second Desktop Section (If Applicable)
For L-shaped desks with two desktop sections, repeat the desktop attachment process described previously. Carefully position the second desktop section, ensuring proper alignment with the already assembled frame and first desktop.
Utilize the M6 x 55mm screws (B) to securely fasten the frame to the second desktop, again employing a diagonal tightening pattern. Double-check that all connections are flush and stable. Pay close attention to the orientation of any pre-drilled holes, ensuring they align correctly with the frame components.
This step is crucial for overall desk stability and functionality.
Installing Additional Components (Shelves, Drawers)
Once the main desk structure is complete, proceed with installing any included accessories like shelves or drawers. Refer to the specific instructions within the PDF manual for these components, as attachment methods vary.
Typically, this involves using smaller M6 x 21mm screws (E) to secure brackets or drawer slides to the desk frame or desktop. Ensure proper alignment before fully tightening screws. Carefully slide drawers into their designated spaces, verifying smooth operation.
Shelves may require additional support brackets for stability. Always follow the manual’s diagrams for correct placement and fastening.
Addressing Common Assembly Issues
During assembly, you might encounter minor issues. Misaligned holes are frequent; gently apply pressure while loosening nearby screws to achieve proper alignment. Avoid forcing screws, as this can strip the threads.

If screws are difficult to tighten, ensure you’re using the correct size and type (M6 x 55mm or M6 x 21mm). A manual screwdriver is preferable initially to avoid over-tightening. Double-check the orientation of frame components – incorrect placement can cause alignment problems.
Consult the PDF manual’s diagrams for clarification. If issues persist, review the troubleshooting section or contact customer support;
11.1 Misaligned Holes
Misaligned holes are a common frustration during L-shaped desk assembly. Don’t force the screws! Begin by loosening the screws in adjacent connection points. This creates a slight flexibility within the frame, allowing for easier alignment.
Gently apply pressure to the components, encouraging the holes to line up. Ensure the correct orientation of parts – sometimes a reversed component causes misalignment. Double-check the PDF manual’s diagrams for accurate positioning.
If slight misalignment remains, a small amount of wiggle room is often built-in. Avoid excessive force, which can damage the desk’s structure.
11.2 Screw Tightening Problems
Encountering difficulty tightening screws is frequent during L-shaped desk assembly. Ensure you’re using the correct screw type – M6 x 55mm for legs to lower bars (9), and M6 x 21mm for desktop glass (13) attachment, as per the PDF manual.
If screws strip easily, avoid over-tightening. Apply firm, even pressure while turning. A manual screwdriver often provides better control than a power drill, preventing damage. If a screw won’t catch, check for debris in the hole.
Slightly loosening adjacent screws can sometimes alleviate pressure and allow the target screw to engage properly. Don’t force it!
Understanding Specific Model Variations (CKP5454GLD ⏤ BattleStation)
The CKP5454GLD “BattleStation” L-shaped gaming desk may have slight variations from generic instructions. The PDF manual specifically details its assembly, noting the importance of correctly orienting the crossbar rails – slots facing inward, closer to the frame’s underside.
Pay close attention to leg attachment; back legs have an extra hole. This model often includes optional shelves or drawers, requiring additional steps outlined in the manual. Ensure proper alignment of the desktop sections before securing them to the frame.
Refer to the parts list to confirm all components are present before beginning, as variations can occur.

Troubleshooting ー Frame Instability
If your L-shaped desk frame feels unstable, revisit the initial construction steps. Ensure all M6 x 55mm screws attaching legs to lower bars (9) are fully tightened. Verify crossbars (G) are securely inserted into the frame slots, facing the correct direction.
Check for misaligned holes – do not force screws. Loosen adjacent connections and attempt realignment. Confirm the desktop is evenly supported by the frame; uneven weight distribution can cause wobble.
Double-check that the regular crossbar rails are correctly inserted into the crossbar ends. A loose connection anywhere compromises stability; systematically tighten all fasteners.
Finishing Touches ⏤ Cable Management
Once assembled, optimize your L-shaped desk setup with effective cable management. Utilize any included cable trays or clips to route cords neatly beneath the desktop surfaces. Consider adhesive cable ties or sleeves to bundle wires together, minimizing clutter.
Strategically position power strips and surge protectors for easy access. Avoid draping cables over the desk edges, as this creates a tripping hazard and detracts from the clean aesthetic.
Explore options like cable boxes to conceal excess cord length. A tidy cable arrangement enhances both functionality and the overall appearance of your workspace.
Safety Check After Assembly
Before fully utilizing your assembled L-shaped desk, perform a thorough safety inspection. Ensure all screws (M6 x 55mm, M6 x 21mm) are securely tightened – revisit steps if needed. Verify the stability of the frame and desktop sections, gently applying pressure to each area.

Check for any protruding hardware or sharp edges that could pose a hazard. Confirm that the desk is level and doesn’t wobble, adjusting foot pads if necessary.
Inspect cable management to prevent tripping hazards. Finally, review the warranty information and support details for future reference, ensuring peace of mind.
Warranty Information and Support
Your L-shaped desk (model CKP5454GLD – BattleStation) is covered by a manufacturer’s warranty against defects in materials and workmanship. The warranty period and specific coverage details are outlined in the complete PDF manual, typically ranging from one to three years.
For warranty claims or support inquiries, contact the retailer where you purchased the desk or directly reach out to the manufacturer’s customer service department.
Retain your proof of purchase and assembly instructions for warranty processing. Online resources, including FAQs and video guides, are also available to assist with troubleshooting and maintenance.
Downloading the PDF Manual Online
Accessing the complete L-shaped desk assembly instructions in PDF format is straightforward. Visit the manufacturer’s official website and navigate to the support or downloads section. Search for your specific model number – CKP5454GLD (BattleStation) – to locate the corresponding manual.
Alternatively, many retailers who sell the desk also provide a downloadable PDF link on their product page. The manual, spanning approximately 145 pages and 55MB in size, contains detailed diagrams, parts lists, and step-by-step guidance.
Ensure a stable internet connection for a quick and complete download. Save the PDF to your computer or mobile device for easy access during assembly.
Alternative Assembly Resources (Video Guides)
While the PDF manual provides comprehensive instructions, visual learners may benefit from supplementary video guides. Numerous online platforms, such as YouTube, host assembly tutorials for L-shaped desks, potentially including models similar to the CKP5454GLD BattleStation.
Search using keywords like “L-shaped desk assembly,” “gaming desk setup,” or the specific model number. These videos often demonstrate each step in real-time, clarifying potentially confusing sections of the PDF.
Remember to verify the video’s relevance to your desk model before following along. Combining the PDF with a video guide can significantly streamline the assembly process and minimize errors.