Welcome to the Shirt Placement Guide‚ your ultimate resource for creating visually appealing and professional custom shirts. Discover essential techniques‚ tools‚ and expert tips to ensure flawless design execution.
1.1 Importance of Proper Design Placement
Proper design placement is crucial for creating visually appealing and professional custom shirts. It ensures designs are balanced‚ proportionate‚ and visually striking‚ enhancing both aesthetics and functionality. Correct placement prevents elements from appearing distorted or misaligned‚ maintaining the integrity of the artwork. Additionally‚ it ensures designs are easily noticeable and communicate the intended message effectively. Proper placement also considers fabric type‚ garment size‚ and printing methods‚ ensuring a polished finish. This attention to detail elevates the overall quality of the shirt‚ making it more attractive to customers.
1.2 Overview of Key Considerations
Successful shirt design placement requires careful consideration of several key factors. Garment size‚ fabric type‚ and printing method are essential to ensure designs align correctly and look professional. Symmetry and balance play a crucial role in creating visually appealing shirts. Additionally‚ understanding brand guidelines and design intent helps in selecting the most effective placement. Tools like rulers and heat press guides aid in precise alignment. Considering these elements ensures a polished finish and maximum visual impact for custom shirts.
Front Placement Options
Explore front placement options to maximize your shirt designs. Chest placement offers a modern look‚ while full front placement ensures maximum visibility and impact. Pocket placement adds subtle style.
These options cater to various design preferences‚ ensuring your artwork stands out effectively.
2.1 Chest Placement: Left Chest and Centered Designs
Chest placement is a popular choice for shirt designs‚ offering both practicality and visual appeal. The left chest area is ideal for small logos or subtle graphics‚ while centered designs create balance and symmetry. This placement ensures your artwork is easily noticeable without overwhelming the garment. For precise alignment‚ use a T-shirt ruler guide to measure and center your design accurately. Whether for casual wear or professional branding‚ chest placement enhances the overall aesthetic of your custom shirts.
2.2 Full Front Placement: Maximizing Visibility
Full front placement is perfect for making a bold statement‚ offering maximum visibility for intricate designs or large graphics. This placement ensures your artwork stands out‚ covering the entire chest area for a striking visual impact. Ideal for promotional shirts or artistic expression‚ full front designs capture attention effortlessly. To achieve precise alignment‚ use a T-shirt ruler guide and ensure the design is centered. This placement balances aesthetic appeal with professional execution‚ making it a versatile choice for casual and promotional shirts alike.
2.3 Pocket Placement: Adding a Subtle Touch
Pocket placement offers a sleek‚ understated way to incorporate designs without overwhelming the shirt. Ideal for small logos or minimalistic graphics‚ this placement adds a touch of sophistication while maintaining a clean look. Positioning designs near the pocket area ensures they remain noticeable yet subtle. For best results‚ align the design with the pocket’s edge and keep it compact to avoid overwhelming the space. This placement is perfect for creating a polished‚ professional appearance on casual or formal shirts.
Back Placement Options
Explore the versatility of back placement options‚ from modern upper back designs to bold full back layouts‚ each offering unique ways to make a lasting visual impact.
3.1 Upper Back Placement: Modern and Stylish
Upper back placement offers a sleek‚ modern aesthetic‚ positioning designs between the shoulder blades for a clean look. It avoids front and sleeve clutter‚ making the design stand out. This placement is ideal for logos or subtle graphics‚ adding sophistication without overwhelming the garment. Measure 5-7 inches below the collar for precise alignment. Use tools like a T-shirt ruler guide to ensure accuracy. This stylish option balances minimalism with visual impact‚ perfect for casual or professional designs.
3.2 Lower Back Placement: Unique and Eye-Catching
Lower back placement is a bold choice‚ positioning designs 8-10 inches below the collar for a striking visual effect. This area offers ample space for intricate artwork or large logos‚ making it ideal for statement-making designs. The lower back creates a focal point that draws attention when the wearer moves or turns. It’s perfect for casual or athletic styles and adds a modern twist to traditional design layouts. For best results‚ use a T-shirt ruler guide to ensure alignment and proportionate sizing.
3.3 Full Back Placement: Bold and Statement-Making
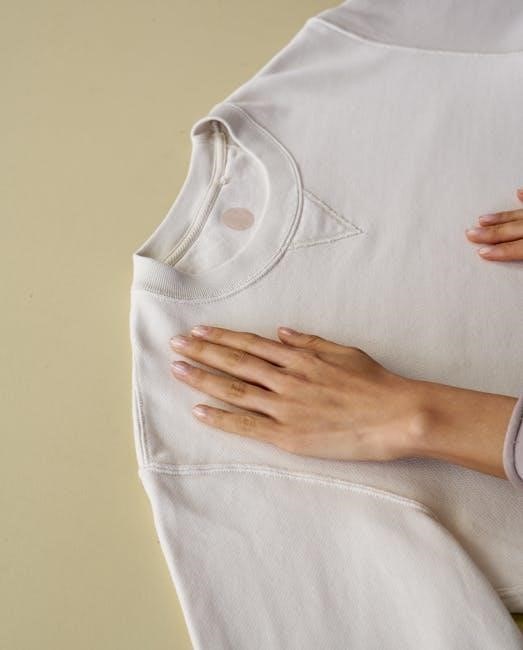
Full back placement is a striking option that covers the entire back of the shirt‚ offering a large canvas for bold designs. Ideal for promotional or artistic purposes‚ this placement allows intricate graphics or logos to stand out. Typically measuring 10-12 inches wide and 12-15 inches tall‚ the design is centered for maximum visibility. It’s perfect for making a strong statement‚ especially when paired with minimal front designs. For precision‚ use a T-shirt ruler guide or heat press alignment tools to ensure proper positioning and alignment‚ avoiding overwhelming the garment with excessive detail.
Sleeve Placement Options
Explore sleeve placement options to enhance your shirt designs with strategic locations and tools for precise alignment‚ ensuring a balanced and visually appealing look every time.
4.1 Left Sleeve Placement: Practical and Discreet
Left sleeve placement offers a subtle yet effective way to showcase designs or logos. It’s ideal for smaller graphics or text‚ ensuring a balanced look without overwhelming the garment. Placing designs 2-4 inches above the sleeve hem is recommended for visibility. This placement works well for casual and professional styles‚ adding a touch of elegance. Use a T-shirt ruler guide for accurate alignment‚ ensuring designs are centered and evenly spaced. This method is perfect for creating a clean‚ understated appearance that complements the overall design.
4.2 Right Sleeve Placement: Balancing the Design
Right sleeve placement is a strategic way to balance your design while maintaining a clean‚ symmetrical look. It pairs well with left sleeve designs‚ creating harmony and visual equilibrium. Position graphics or text 2-4 inches above the sleeve hem for optimal visibility. This placement is ideal for complementary designs or logos‚ ensuring the overall aesthetic remains cohesive. Use alignment tools like a T-shirt ruler guide to achieve precision‚ ensuring the design aligns perfectly with the left sleeve for a polished‚ professional finish.
4.3 Dual Sleeve Placement: Enhancing Visual Appeal
Dual sleeve placement offers a dynamic way to enhance visual appeal by distributing designs across both sleeves. This symmetry creates balance and draws attention to the artwork. Place designs 2-4 inches above the sleeve hem on both arms for consistency. Dual sleeve placement works well for complementary graphics or mirrored patterns‚ adding depth and interest to the shirt. Use alignment tools like a T-shirt ruler guide to ensure precision and maintain a polished‚ professional look that elevates the overall design aesthetic.

Alternative Placement Ideas
Explore creative design placements beyond traditional areas‚ such as hem‚ yoke‚ or side panels‚ to add unique flair to your shirts. These less common spots offer fresh styling opportunities while maintaining functionality and visual balance‚ perfect for standout designs that capture attention and reflect individuality.
5.1 Hem Placement: Adding a Decorative Element
Hem placement offers a subtle yet stylish way to incorporate decorative elements. Positioning designs or text along the hem‚ typically 7.5 to 9 inches from the shoulders‚ adds a unique flair without overwhelming the garment. This placement is ideal for small graphics‚ slogans‚ or brand logos‚ creating a balanced look that complements other design areas. It’s perfect for those seeking understated elegance or a modern twist on traditional designs‚ ensuring versatility across various shirt styles and sizes.
5.2 Yoke Placement: A Stylish and Functional Option
Yoke placement is a versatile and practical choice for adding designs or text. Positioned across the top back‚ spanning 7.5 to 12 inches wide‚ it offers a subtle yet stylish way to enhance your shirt. Ideal for small to medium-sized designs‚ such as logos or short phrases‚ yoke placement ensures visibility without overwhelming the garment. This option is particularly effective for creating a balanced look‚ making it a great choice for casual and formal designs alike. Its functionality and aesthetic appeal make it a popular choice for many.
Tools and Techniques for Precise Placement
Essential tools like a T-shirt ruler guide and heat press alignment tools ensure accuracy and consistency. These resources help achieve professional results for custom shirt designs every time.
6.1 Using a T-Shirt Ruler Guide for Accuracy
A T-Shirt Ruler Guide is a must-have tool for precise design placement. It features alignment grooves and measurement markers to ensure designs are centered and evenly spaced. Perfect for heat press users‚ this guide helps maintain consistency across all shirt sizes. For unique designs‚ consider creating a custom ruler tailored to your specific needs. Made from durable materials like cardstock or plastic‚ it withstands repeated use. Ensure the shirt is smooth and flat before placing the design for optimal accuracy. Additionally‚ using a ruler guide elevates your custom shirts to a professional level‚ making them stand out in both appearance and quality.
6.2 Heat Press Alignment Tips and Tricks
Accurate heat press alignment is crucial for professional results. Always pre-press the shirt to remove wrinkles‚ ensuring a smooth surface. Use a laser alignment guide or a T-Shirt Ruler Guide to center designs perfectly. Measure from the center of the shirt and double-check placement before pressing. For intricate designs‚ consider using a heat-resistant tape to secure the vinyl. Invest in a high-quality heat press with digital controls for precise temperature and time adjustments. Proper alignment ensures vibrant‚ long-lasting prints and enhances the overall appearance of your custom shirts.
Fabric Type and Size Considerations
Understand how fabric type and garment size impact design placement. Cotton‚ polyester‚ and blends require tailored approaches‚ while larger shirts need bigger designs and smaller shirts need smaller‚ balanced prints.
7.1 Choosing the Right Fabric for Your Design
Selecting the appropriate fabric is crucial for optimal design placement; Cotton fabrics are ideal for heat press applications‚ offering a smooth surface for vibrant prints; Polyester and blends provide durability but may require adjustments for texture and ink adhesion. Consider the breathability and softness of materials like tri-blend for a premium feel. The fabric type directly impacts print quality‚ so choose wisely based on your design’s complexity and desired finish. This ensures long-lasting‚ professional-looking results for custom shirts.
7.2 Adjusting Placement Based on Garment Size
Proper design placement varies by garment size to ensure a balanced look. Use a T-shirt ruler guide to measure and align designs accurately. For adult shirts‚ designs are often placed 7-9 inches from the shoulder seam and 4-6 inches from the center. Youth and smaller sizes require scaled-down measurements. Ensure the design size proportionally matches the shirt size for optimal visual impact. Correct placement enhances professionalism and ensures a polished appearance across all garment sizes‚ from small to extra-large.
Mastering shirt placement is key to creating professional‚ visually appealing designs. By considering garment size‚ fabric type‚ and design elements‚ you can ensure optimal placement for any shirt. Use tools like rulers and heat press guides for precision. Whether for logos‚ artwork‚ or text‚ proper placement enhances the overall aesthetic. Apply these tips to elevate your custom shirt designs‚ ensuring they stand out and make a lasting impression. This guide provides a comprehensive foundation to help you achieve flawless results every time.
